 |
| Outline Embroidery stitch |
Outline Stitch
This stitch is called an outline stitch. Draw a straight line. From one end of the line, the needle with the yarn is first lifted up through the fabric. We will move the cell from the left side to the right side of the straight line. You can also go from right to left. Then the needle with the thread should be taken downwards through the fabric at a specified distance from top to bottom. The needle should be brought up through the fabric from the bottom with the thread again between the two threads. By doing the same thing again and again, moving right along the straight line, we get a nice outline stitch. Watch the above video to learn practically.
Drizzle Stitch
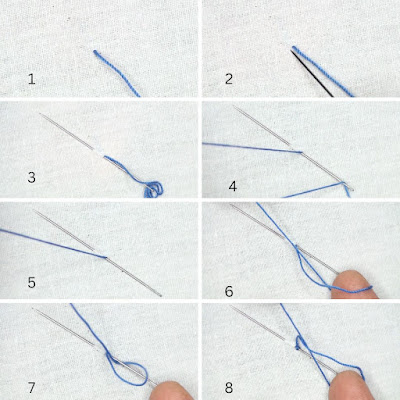
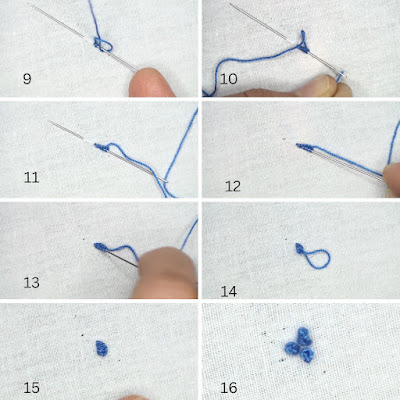
Today we will learn Drizzle Embroidery Stitch. First, stick the needle with the cloth. Hold the thread with the left hand and pull the thread with the left hand with a patch behind the needle with the finger of the right hand. After knotting like this 4-5 times, take the yarn behind the needle. Then pull the needle from the back out of the fabric and back down through the fabric from the top. And there is your first drizzle stitch it looks like a little slug sticking out of the fabric. You can use this stitch for the center of flowers and things like that.
 |
| Drizzle embroidery stitch |


0 Comments